Discover practical and durable solutions for your workshop with heavy-duty workbench plans. These designs offer unmatched strength‚ versatility‚ and functionality for professionals and hobbyists alike‚ ensuring long-lasting performance.
Overview of the Importance of a Sturdy Workbench

A sturdy workbench is the backbone of any efficient workshop‚ providing a stable and durable surface for handling heavy tasks. Its robust construction ensures it can support heavy loads without wobbling‚ making it essential for woodworking‚ metalworking‚ and other demanding projects. A well-built workbench enhances productivity by offering a reliable workspace for tools and materials. It also reduces fatigue and prevents accidents caused by unstable surfaces. With optional features like storage compartments and vises‚ a heavy-duty workbench adapts to various needs‚ catering to both professionals and DIY enthusiasts. Investing in a high-quality workbench is a long-term solution for maintaining efficiency and safety in your workshop.

Materials and Tools Required
Essential materials include 4×4 lumber for legs‚ 2x4s for framing‚ and 3/4-inch plywood for the top. Tools needed are drills‚ saws‚ screws‚ clamps‚ and wrenches for assembly.
Choosing the Right Lumber for Durability
Selecting the appropriate lumber is crucial for constructing a heavy-duty workbench. Opt for durable‚ high-quality materials like solid hardwoods or pressure-treated pine for maximum strength. For the legs and frame‚ 4×4 lumber is ideal due to its robustness and stability. The workbench top can be crafted from 3/4-inch plywood or MDF‚ ensuring a smooth‚ even surface. Always inspect the lumber for any warping or imperfections‚ as these can compromise the workbench’s structural integrity. Properly sealing or finishing the wood will enhance its resistance to moisture and wear. By choosing the right lumber‚ you ensure your workbench remains sturdy and reliable for years of heavy use in your workshop.
Essential Tools for Building a Heavy Duty Workbench
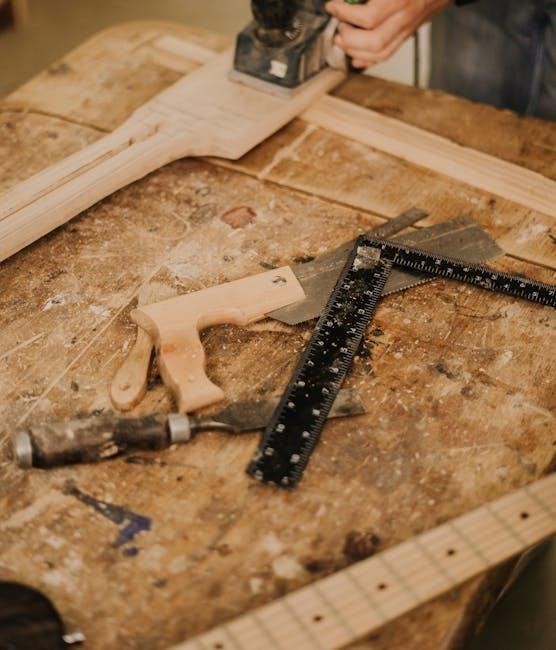
To successfully construct a heavy-duty workbench‚ gather the necessary tools to ensure precision and efficiency. A circular saw or hand saw is essential for cutting lumber to the required dimensions. A cordless drill and impact driver will handle screwing and bolting components together. Clamps are crucial for holding the frame and top in place during assembly. Measuring tools like a tape measure and square ensure accurate cuts and alignments. Sandpaper or a belt sander will smooth out rough edges and surfaces. Additionally‚ a level and wrench or socket set will aid in securing bolts and ensuring stability. Having these tools readily available will streamline the building process and guarantee a professional-grade finish for your workbench.
Design Considerations
A well-designed heavy-duty workbench maximizes functionality and durability‚ featuring sturdy legs‚ ample workspace‚ and optional storage solutions to enhance efficiency and adaptability for various workshop tasks.
Dimensions and Layout for Maximum Efficiency
A heavy-duty workbench should be designed with precise dimensions to accommodate various tasks. A standard size of 36 inches in height and 60-72 inches in length provides optimal ergonomics and workspace. The layout should prioritize accessibility‚ with ample room for tools and materials. Consider a width of 24-30 inches to ensure stability without sacrificing mobility.
Integrate shelving or cabinets below the work surface for storage‚ keeping essentials within easy reach. A recessed area for small parts or a built-in vice enhances functionality. Ensure the design allows for future modifications‚ adapting to evolving workshop needs while maintaining durability and efficiency.
Optional Features: Storage‚ Vises‚ and Clamp Systems
Enhance your workbench’s functionality by incorporating storage solutions‚ vises‚ and clamp systems. Built-in shelving or cabinets provide convenient storage for tools and materials‚ keeping them organized and accessible. A vice mounted on the work surface ensures secure clamping of workpieces‚ while a tail vise offers additional flexibility for intricate projects.
Clamp systems‚ such as T-track or dog holes‚ allow for versatile clamping configurations‚ accommodating various sizes and shapes of materials. These optional features not only improve efficiency but also adapt to specific work needs‚ making the workbench a tailored workspace for any project. By integrating these elements‚ you can create a customized setup that meets your unique requirements and enhances your overall woodworking experience.
Step-by-Step Building Guide
A comprehensive guide outlines the process‚ from preparing frames to final assembly. Follow detailed instructions to ensure a sturdy and functional workbench tailored to your needs.

Preparing the Frame and Legs
Start by cutting the 4×4 lumber for the legs and 2×4 or 2×6 boards for the frame rails. Use a saw to ensure precise cuts. Drill pilot holes for bolts to avoid splitting the wood. Assemble the legs and rails using heavy-duty bolts‚ ensuring a square and stable base. Tighten all connections firmly but avoid overtightening. Sand the edges for smoothness. Double-check the frame’s alignment and stability before moving forward. This step is crucial for ensuring the workbench’s overall durability and balance‚ especially when handling heavy loads. Proper preparation here guarantees a solid foundation for the entire project. Follow the plans carefully to achieve professional results.
Assembling the Workbench Top and Shelving
Begin by laying out the workbench top planks‚ ensuring they are evenly spaced and aligned. Use clamps to secure them tightly. Drill pilot holes through the frame into the planks and attach using lag screws. Tighten evenly to avoid warping. For shelving‚ cut the plywood or MDF to size and attach supports between the legs. Use screws to secure the shelf‚ ensuring it is level. Sand all surfaces for a smooth finish. Consider adding a protective coating for durability. Proper assembly ensures the workbench top is sturdy and the shelving is stable‚ providing ample storage and workspace. Follow the plans carefully to achieve a professional-grade result. This step completes the structural foundation‚ ready for finishing touches.
Final Assembly and Sanding
After assembling the frame‚ legs‚ and shelving‚ proceed to the final assembly by attaching all components securely. Tighten all bolts and screws to ensure stability. Sand the entire workbench‚ including the top‚ shelves‚ and legs‚ to smooth out any rough edges or splinters. Start with coarse-grit sandpaper and progress to finer grits for a polished finish. Wipe away dust with a tack cloth. Apply a protective finish‚ such as oil or varnish‚ to enhance durability. Allow the finish to dry completely before use. Inspect the workbench to ensure all parts are aligned and secure. Sanding and finishing are crucial for both aesthetics and functionality‚ ensuring your heavy-duty workbench withstands heavy use and lasts for years. Proper sanding also prevents splinters‚ making the surface safe to work on. Final assembly and sanding complete the project‚ readying it for your workshop demands. Always wear safety gear during this process. A well-sanded and finished workbench not only looks professional but also performs exceptionally well under heavy loads. Ensure all surfaces are even and smooth for optimal usability. This step is essential for achieving a professional-grade workbench. Proper sanding ensures durability and stability‚ making it safe and reliable for all your projects. Final assembly and sanding are the last steps before enjoying your new heavy-duty workbench. Always double-check the tightness of all connections to ensure maximum stability. Sanding is a critical step that prepares the workbench for use and protects it from wear and tear. A smooth finish also prevents tools and materials from being damaged during use. This step ensures your workbench is both functional and visually appealing. Final assembly and sanding are the final touches that bring your heavy-duty workbench to life‚ ready to handle demanding tasks in your workshop. Proper sanding ensures a professional finish and enhances the workbench’s longevity. Always follow safety guidelines when sanding and handling power tools. This step is vital for achieving a workbench that is both sturdy and visually appealing. Final assembly and sanding complete the transformation from raw materials to a durable‚ functional workbench. Ensure all edges are smooth and surfaces are even for safe and efficient use. This is the last step before your workbench is ready to support your woodworking projects. Proper sanding and finishing ensure the workbench remains stable and resistant to damage. Final assembly and sanding are the culmination of your efforts‚ resulting in a high-quality workbench tailored to your needs. Always inspect the workbench thoroughly after sanding to ensure all parts are secure and properly aligned. Sanding is a meticulous process that pays off in the long run by providing a smooth‚ durable surface. Final assembly and sanding are the final steps in creating a workbench that will serve as the backbone of your workshop for years to come. Proper sanding ensures the workbench is safe‚ stable‚ and ready for heavy-duty use. Always take your time during this step to achieve the best results. Final assembly and sanding complete the project‚ transforming raw materials into a sturdy‚ functional workbench. Ensure all surfaces are smooth and even for optimal performance. This step is essential for achieving a professional-grade workbench that meets your workshop needs. Proper sanding enhances both the appearance and durability of the workbench‚ making it a worthwhile investment of time and effort. Final assembly and sanding are the last steps before enjoying the benefits of your new heavy-duty workbench. Always prioritize safety and precision during this process. Sanding ensures the workbench is not only functional but also safe to use‚ preventing splinters and ensuring a smooth working surface. Final assembly and sanding are the final touches that bring your heavy-duty workbench to life‚ ready to handle demanding tasks in your workshop. Proper sanding ensures a professional finish and enhances the workbench’s longevity. Always follow safety guidelines when sanding and handling power tools. This step is vital for achieving a workbench that is both sturdy and visually appealing. Final assembly and sanding complete the transformation from raw materials to a durable‚ functional workbench. Ensure all edges are smooth and surfaces are even for safe and efficient use. This is the last step before your workbench is ready to support your woodworking projects. Proper sanding and finishing ensure the workbench remains stable and resistant to damage. Final assembly and sanding are the culmination of your efforts‚ resulting in a high-quality workbench tailored to your needs. Always inspect the workbench thoroughly after sanding to ensure all parts are secure and properly aligned. Sanding is a meticulous process that pays off in the long run by providing a smooth‚ durable surface. Final assembly and sanding are the final steps in creating a workbench that will serve as the backbone of your workshop for years to come. Proper sanding ensures the workbench is safe‚ stable‚ and ready for heavy-duty use. Always take your time during this step to achieve the best results. Final assembly and sanding complete the project‚ transforming raw materials into a sturdy‚ functional workbench. Ensure all surfaces are smooth and even for optimal performance. This step is essential for achieving a professional-grade workbench that meets your workshop needs. Proper sanding enhances both the appearance and durability of the workbench‚ making it a worthwhile investment of time and effort. Final assembly and sanding are the last steps before enjoying the benefits of your new heavy-duty workbench. Always prioritize safety and precision during this process. Sanding ensures the workbench is not only functional but also safe to use‚ preventing splinters and ensuring a smooth working surface. Final assembly and sanding are the final touches that bring your heavy-duty workbench to life‚ ready to handle demanding tasks in your workshop. Proper sanding ensures a professional finish and enhances the workbench’s longevity. Always follow safety guidelines when sanding and handling power tools. This step is vital for achieving a workbench that is both sturdy and visually appealing. Final assembly and sanding complete the transformation from raw materials to a durable‚ functional workbench. Ensure all edges are smooth and surfaces are even for safe and efficient use. This is the last step before your workbench is ready to support your woodworking projects. Proper sanding and finishing ensure the workbench remains stable and resistant to damage. Final assembly and sanding are the culmination of your efforts‚ resulting in a high-quality workbench tailored to your needs. Always inspect the workbench thoroughly after sanding to ensure all parts are secure and properly aligned. Sanding is a meticulous process that pays off in the long run by providing a smooth‚ durable surface. Final assembly and sanding are the final steps in creating a workbench that will serve as the backbone of your workshop for years to come. Proper sanding ensures the workbench is safe‚ stable‚ and ready for heavy-duty use. Always take your time during this step to achieve the best results. Final assembly and sanding complete the project‚ transforming raw materials into a sturdy‚ functional workbench. Ensure all surfaces are smooth and even for optimal performance. This step is essential for achieving a professional-grade workbench that meets your workshop needs. Proper sanding enhances both the appearance and durability of the workbench‚ making it a worthwhile investment of time and effort. Final assembly and sanding are the last steps before enjoying the benefits of your new heavy-duty workbench. Always prioritize safety and precision during this process. Sanding ensures the workbench is not only functional but also safe to use‚ preventing splinters and ensuring a smooth working surface. Final assembly and sanding are the final touches that bring your heavy-duty workbench to life‚ ready to handle demanding tasks in your workshop. Proper sanding ensures a professional finish and enhances the workbench’s longevity. Always follow safety guidelines when sanding and handling power tools. This step is vital for achieving a workbench that is both sturdy and visually appealing. Final assembly and sanding complete the transformation from raw materials to a durable‚ functional workbench. Ensure all edges are smooth and surfaces are even for safe and efficient use. This is the last step before your workbench is ready to support your woodworking projects. Proper sanding and finishing ensure the workbench remains stable and resistant to damage. Final assembly and sanding are the culmination of your efforts‚ resulting in a high-quality workbench tailored to your needs. Always inspect the work

Customization Options
Customize your workbench with adjustable shelves‚ integrated vise systems‚ and additional storage solutions to meet specific workshop needs‚ enhancing functionality for both hobbyists and professionals.

Modifying Plans for Specific Work Needs

Modify heavy-duty workbench plans to suit your workflow by incorporating storage solutions‚ such as drawers or shelves‚ for better tool organization. Add integrated vise systems or clamp rails for enhanced versatility. Consider adjustable height options or ergonomic features to improve comfort during long projects; For professionals‚ adding specialized mounts or jigs can streamline repetitive tasks. Hobbyists may opt for modular designs that allow for future expansions or custom layouts. Ensure all modifications align with the workbench’s structural integrity to maintain durability. These customizations enhance functionality‚ making the workbench a tailored centerpiece for your workshop needs.
Refer to free PDF plans or DIY guides for inspiration and step-by-step instructions to implement these changes effectively.
Ensuring Stability and Safety in the Workshop

Safety Tips and Best Practices
Ensure stability by anchoring the workbench to the floor. Always wear protective gear and maintain a clean workspace to prevent accidents. Follow proper lifting techniques.